Thursday, May 28, 2009

what's next?


Hmm, what could I possibly be working on with oilcloth and odd set of tools?   It's a crazy idea that I just came up with today.  I hope to have it ready for you all really soon!  In the mean time the kids and I are having fun with it.  So far there is no sewing involved!   

Monday, May 25, 2009

The Oilcloth Alfresco Series, Picnic Basket


It is time to get this summer rolling! For our first summer tutorial, we are gonna trick out a vintage picnic basket and go off for a well organized picnic! This is a basket I made for a dear friends bridal shower gift. I have to say it was a big hit!

I started off this project by shopping for a vintage picnic basket on Etsy, I found my gem of a basket at Stiletto Girl. Since then I have found a few at local antique shops that are just as sweet.

Once I had the basket ordered, I grabbed my stash of vintage cloths napkin sets, and headed off for Target. There I found plates that were on my friends bridal registry and they matched one of the groovy napkin sets. Sweet! I grabbed two of everything for a romantic picnic for two. Oh to be a newlywed once more!

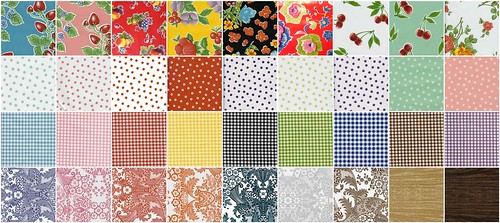
Once the basket got here, I knew it needed some extra love! I grabbed some oilcloth that worked with the plates and napkins" orange lace and walnut faux bois. This was really a fun project, I am itching to make on for myself!

materials:
  • 1-2 yards of oilcloth depending on if you want to do a contrasting pocket.

  • picnic basket or cooler!


step 1. To create a bottom lining you will want to trace the bottom of the basket on to the wrong side of the your oilcloth.


step 2. Then cut inside the pattern 1/2 inch to make it fit the inside of the basket. You may need to trim a bit off here and there since the inside shape isn't exactly the same as the outside. Be patience and just take small amounts off at a time, do this until you get it to fit snugly inside the basket.

step 3. Measure the inside circumference of your basket and add 3 inches. The circumference of this basket was around 55 inches.


step 4. Cut two pocket layers, one at cir. plus 3" by 10" and the second at cir. plus 3" by 8". You may need to piece this together to make it long enough.


step 5. Hem the top of both pocket layers at 1 1/2".

step 6. Lay the 8" layer on top of the 10" layer and sew them together at the bottom. Oilcloth doesn't fray so feel free to so a simple edge stitch.


step 7. Now for the fun part, pockets--lots and lots of pockets! I am giving you my basic layout but you can certainly tailor your picnic pocket to suit your needs.


step 8. Now pack up that bad boy and get to picnicin' !!

NOTE: Since oilcloth is waterproof and easy to clean you could make an extra picnic pocket for the cooler, think condiment storage!!! I love it! I am so doing that for our Wednesday pool cookout night!

Thursday, May 21, 2009

Memorial Day Sale!


spring and summer oilcloths, originally uploaded by ModernJune.

Summer is here and it is time to get crafty!  With 36 cheery and bright oilcloths to choose from Oilcloth Addict is sure to have something to please!   

Memorial Day Sale starts Friday, 15% off for all blog readers.  
Use the MDS10 coupon at check out, we will send you an adjusted invoice via Pay Pal.  
Shop early while supplies last!  Sale ends Tuesday.  

Spread the word!!

I have loads of ideas for the summer so stick around, summer tutorials will begin once my new camera arrives!  
I dropped my old one in the middle of the first summer tutorial.  But don't worry the new one is dreamy and much improved, it just needs to get here!!!

Wednesday, May 20, 2009

Wednesday, May 13, 2009

OCA Sewing Tip #6: Presser Foot Trick


Back in October of 2008 I had this to say about using a proper pressure foot:
When sewing with oilcloth it is important to have the right presser foot. Oilcloth has tendency to crawl and to not want to stay put, this results in puckers at every pin. Using a roller foot or a teflon foot will help remedy this. When you use one of these handy presser feet you take some of the friction away and have less puckers in your seams.
These pressure feet can be costly, and I could see why someone might be worried about the cost if this was their first oilcloth project. So, the other day I was thrilled to get the following tip from another Oilcloth Addict!

One of our readers had recently read on a sewing forum that you could use painters tape on the bottom of a regular pressure foot. This really works! I don't have a proper foot for my industrial, so there are just some projects I can't do on that machine, for example, topstitching.


I didn't have any painters tape, so I used plain old masking tape! Place the tape on bottom of your favorite pressure foot and then just cut it away using a sharp exacto knife. Now your good to go.


Thanks so much for that no cost solution! If you have a good tip, please contact me at Kelly@modernjune.com.

BTW, I am still working on this weeks tutorial, I made something really fun but when I was done with it I came up with a better way to do it! So back to the back yard drawing board!!! Intrigued yet?

Friday, May 8, 2009

Great Idea, oilcloth air conditioning covers

Photo Credit: Apartment Therapy: Sara Lov's Los Felize Charmer

This proves it 0ilcloth can do it all! One thing that I do everyday is to cruise at least one Apartment Therapy House tour. Look what I found today! Sara is my kind of girl! She used the Istanbul Oilcloth to cover her unused window unit! Genius

For this and other fun ideas stick around cuz this May and June I will be tricking out my own back yard with some fun oilcloth projects! One tutorial a week, I learned during the pantry week is that doing a week of tutorials was pretty hard.

See you on Tuesday for the first Outdoor Project. It is a fun and easy one, it promises to surprise and please ya!!!

Q & A; chalk vs. chalk marker


Recently, I received a great question concerning what works best on chalk cloth, chalk sticks or chalk makers? I just had to share my answer with you all. (BTW, we now have chalk markers in the shop)

The question was...Can you use only traditional sticks of chalk or are those chalk markers used on menu boards safe as well?

The answer is... both are great on chalk cloth! First you need to cure your chalk cloth and then you are good to go.

I prefer the chalk sticks for everyday use. We homeschool our kids so I use our chalk cloth board daily, I use regular chalk for lessons. But I like using the markers/pens for more long lasting applications, such as my chalk cloth labels and Mason Jars.

Note: The chalk cloth markers can require a bit of elbow grease to get off the chalk cloth if the writing has been on there for a while. I think it is worth the extra effort!

Got a question? Bring it on!

Tuesday, May 5, 2009

Cinco de Mayo Sale!!!


It is that time of year again!
Time to break out the Mexican Oilcloth and have a party!

Happy Cinco de Mayo!

Enjoy 15% off your OILCLOTH ADDICT purchase, the offer is good for the next 5 days!
At check out drop this coupon code (CINCOsale15)
into the "note to seller box" and wait for your adjusted pay pal invoice.


Monday, May 4, 2009

Great Idea, Coupon Clutch


Isn't this cool? This coupon clutch from The Object Project, would be fun in oilcloth!


I love making flowers appliques out of oilcloth, I have made flower appliques with dots and gingham, but I also love taking a flower from one of the floral prints. A poppy from the Yellow Poppy oilcloth or the big turquoise blossom from Istanbul oilcloth is also very fun. Just cut out your flower and use on all kinds of projects.


This project would be a perfect use for the Four Fat Lil' Quarters of oilcloth!